Several years ago, a friend asked me to reframe a print which had sentimental value. I gently removed nails from the rear of the frame and lifted the cardboard backing. What I saw was a disaster, the consequences of a series of framing mistakes. On the back of the print, the corrugated cardboard had left brown lines. The print had masking tape across the top of the print and in the corners at the bottom. The tape was dark brown with age, and the paper around the tape was brown. On the front of the print, where the mat touched it, the paper was tan and brittle, like an old newspaper. The print was taped along the top and on the corners. Even though the print was taped down, it was warped.
Paper made from untreated wood pulp is acidic. It's the lignin in wood pulp that causes paper to turn yellow and brittle. The deterioration is accelerated by light and heat. Warping of the print was caused by taping down the print on all corners. The passage of time will damage any artwork which uses inappropriate framing materials, such as cardboard, scotch tape or masking tape, and cheap mat board. Using inappropriate framing methods, such as taping down all the edges of artwork, will add to the damage.
Conscientious framers and galleries use appropriate archival materials and methods. Do-it-yourself framing may be for you if you're framing lots of art work on paper, such as photographs, fine art reproductions, and original art on paper. Even if you have only a few items to frame and you hire someone else do your matting and framing, it's useful to know how quality framing improves the longevity of art.
The longevity of art is improved with quality conservation choices in framing materials, such as mat and mounting boards. A range of standards are used by the paper industry. For example, "acid-free" is a misnomer. Acid-free boards are not necessarily acid-free. Acid-free paper has some acid in it; the product is generally buffered with calcium carbonate or magnesium carbonate to provide an alkaline reserve. Acid-free papers and boards have a life expectancy of about 100 years, which means they are perfectly appropriate for a giclee reproduction, which can be expected to last about the same number of years.
For original works of art on paper, using archival boards and papers is a better option than acid-free boards. Archival paper is especially durable, permanent, and acid-free. One of my pastel paintings, for example, should last for many centuries with archival framing and with appropriate conservation. In choosing materials for framing original art, it's prudent to pay attention to archival grades. Some boards labeled "archival" are made from wood pulp that is buffered. They are a good choice for a reproduction, but for an original, the best conservation choice is an archival board made from 100% cotton. Art stores sometimes refer to it as "museum board".
Framers should always maintain a high standard of cleanliness and organization. Before handling paper, framers wash their hands or wear thin, cotton gloves, because the natural oil on hands is acidic. A framer's work space is clean, tidy, and organized. One way to prevent that annoying speck of dust between the glass and mat is by maintaining a high standard of cleanliness. Organization matters; wasting minutes looking for a tool is unnecessarily frustrating. Safety matters, too. I wear appropriate gloves to handle glass. With gloves, I avoid marks on the glass and cuts on my fingers.
Among my early framing mistakes was choosing the wrong mat color. The purpose of a mat is to create a breathing space between the glass and the work of art, to provide an unobtrusive transition from the frame to the artwork, or to dramatize the artwork. A frame shop sells an overwhelming range of mat colors. However, the lighting in the store might be different than the lighting in your home. Subtle color shifts occur under different lighting conditions. The mat color that looked perfect in the frame shop might look different in your home.
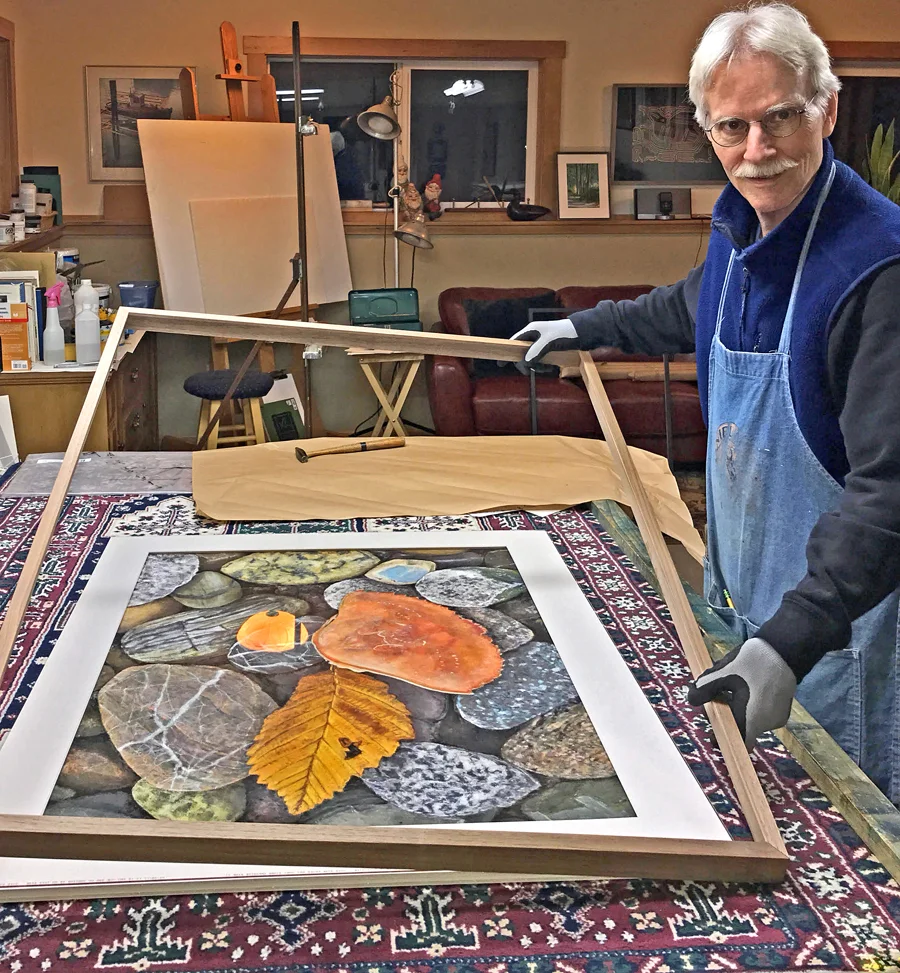
The lesson I learned from my mistakes was that keeping things simple worked best. For my artwork, the most successful mat color choices are warm white, cream, and medium gray. My suggestion is that you start with these three basic colors, and then branch out if you love brightly colored mats. The photograph for this blog shows one of my pastels with a light gray mat, which looks white in the photograph, with a one-inch wide walnut frame. I prefer to make the artwork the focus instead of the framing, but this is a matter of taste. I like to paint large pastels. A smaller pastel might look grand in an extra wide, dramatic wood frame.
Be aware that many mats of color - the kind with color on the surface and white on the reverse side - aren't museum-grade. A thin layer of buffered paper protects the art work from the rest of the mat, which is not acid-free. Within a year, the beveled edge of the mat changes from white to tan, an advertisement to my eye that the mat isn't museum-grade. This doesn't mean it's a poor choice. It's fine, if the longevity of this type of mat and the artwork are similar.
When cutting a mat, my experience is that a 2-ply board is too thin because it tends to cockle. "Cockle" in this sense is an artist's term referring to wrinkled or rippled paper caused by changes in humidity. A better choice is a 4-ply board for mats. I also use 4-ply as a mounting board for artwork because the mat and the mounting board should be the same ply. In some situations where the substrate, or ground, for the artwork is completely affixed to the mounting board, an 8-ply might be the best choice. Conservation framers, however, don't recommend dry or wet mounting artwork to a mounting board.
For me, it's nearly impossible to satisfactorily cut 4-ply boards with a straight edge and razor blade, and since I couldn't master the hand-held mat cutter, I happily invested in a professional table mat cutter. There are many good mat cutters available. What you decide to buy depends on your budget, the reviews of consumers, and on how often you might use it.

A professional mat cutter is worth the expense if you plan to cut a lot of mats.
A space for framing your matted art work is indispensable. . If you lack space, a kitchen table might do for getting started or for framing one or two reproductions, but if you plan to frame several works of art on paper, eventually you'll need a clean space dedicated to cutting mats and putting frames together. To make a framing table, I bought two used office desks with drawers and laid a sheet of three-quarter inch plywood on top of the desks. I store framing materials and tools in the drawers of the desks. A flat, wool rug on top of the plywood provides a cushioned work space for assembling frames. I screwed an L-shaped, one-inch square piece of molding at the edge of the framing surface to secure the carpet and to support the frame when driving in brads
An alternative to mats is to use a plastic spacer between the glass and the artwork which will provide a breathing space and ensure that the artwork does not touch the glass. This works well, especially if the wood frame is wide.
When I started framing my work, I used a small hammer to nail down the framing materials and backing board. By "framing materials", I'm referring to the glass, mat, artwork and mounting board, and a backing board, such as a sheet of archival foam core. A small hammer works fine, but I graduated to professional tools. I highly recommend them. The Fletcher FrameMaster Point Driver shoots a flat, small piece of metal into the frame to secure the backboard. It's a great tool for framing photographs and reproductions. The other tool, the Fletcher FrameMate, allows me to gently squeeze small nails into the frame. I use this tool when I'm framing pastels.
In my opinion, one of the worst framing options is buying ready-made frame packages (frame, glass and backing) for a few dollars. It seems like a bargain, but the framing materials will eventually ruin the artwork. The paper products used in cheap frames are not acid-free. If you substitute better products, it's likely the rabbet of the frame won't be deep enough. (The rabbet is the recess on the back inside edge of the frame into which the artwork fits.) The glass is the poorest quality. Moreover, a cheap frame won't hang straight or hang securely. Don't waste your money. All works of art on paper are worth a quality frame, UV-filter glazing if you can afford it, and appropriate acid-free or archival materials.
If your artwork is a standard size, a photograph for example, a ready-made standard-sized frame (not a package with cheap paper materials and glass) will probably meet your needs. Many Internet companies sell good pre-assembled frames. Ready-made frames are sometimes of lower quality than the molding you can buy in lengths. If you have some carpentry skills, and you have the work space, you will probably want to purchase lengths of molding that you cut to size and join together. It's less expensive and the quality is good, but you will need more tools and time.
Many styles of frames are available. My taste in frames, like my taste in mat colors, is to keep it simple. Unless a wide, fancy frame enhances the artwork and interior, an inch wide, square frame that is brown, black, or a natural hard wood will suit most artwork. To accommodate archival framing materials, I choose frames with a rabbet at least 1-1/8 inches deep.

After applying wood glue to the mitered corners, and binding them together, I use a Pony Strap to ensure a tight bond.
There are probably better methods for determining the dimensions of a frame than the one I use. For what it's worth, I measure the dimension of my art work, a little shy of the edge of the art, so the mat will fully cover it. Then I add the size of the mat width I want. To my eye, artwork seems to rest in the mat better when the base is slightly wider than the sides and top of the mat. Sometimes, if the mat sits on the bottom of the frame more closely than it does at the top, that extra width makes all the difference. If you are using a ready-made frame, the inside of the frame where the glass fits (the rabbet) will determine width of your mat. When fitting to an existing frame, measure the frame's inner dimension first, and then calculate the width of the mat you need for the artwork.
If you've not made the measurements before, it might be easier to understand the process by following the arithmetic instead of the words. Usually art work is listed height first and width second. Suppose my artwork measures 33.75" high and 26" wide. I decide I want a mat that is 3" wide; therefore, 3" on one side and 3" on the other side, which adds to 6". I add the 6" to the width, 26 + 6, which is 32". Next, I add 3" to the top and 3.25" to the bottom of the mat, 33.75 + 6.25, which is 40". Now I know that to frame my art, the glass, mat board, mounting board, and backing board will need to be cut precisely 32" x 40". The dimension of the frame, however, is usually cut about 1/8" larger on all sides to accommodate all the material.
Artwork is usually taped to a mounting board. After the artwork is secured with tape, the mat for the artwork is placed on top of the mounting board. Since the mounting board and the mat will surround the art, the boards must be acid-free or archival. That goes for the tape, too. I've used Lineco's self-adhesive linen cloth tape for reproductions. It might be okay for smaller works of art, like photographs, but for larger works, and for the heavier paper I use for pastels, the tape may not hold. For art work on heavier paper, my choice is Lineco's gummed linen hanging tape. Both products are archival.
The box in which the tape is packaged has pictures that show how to use the tape properly. Artwork should not be taped on all corners. Works of art on paper need to expand and contract with changes in humidity and temperature. If works on paper are fastened so the sides and bottom edges can't move, the sad result will be cockling of the paper.
For conservation framing, the recommended tape is Japanese paper torn into strips and attached with cooked rice or wheat starch paste. Insta-Hinge has re-wettable starch in the paper making it easier to use.

Seal Frames on the inside of the rabbet to prevent acid from the wood frame migrating into your artwork and mat over time.
If a wood frame is unfinished inside (the rabbet), ideally that area should be sealed to keep the acid in the wood from migrating into the mat board and the mounting board. Lineco's Frame Sealing Tape is designed for this specific purpose. The point is to make an environment for a work of art on paper that is as acid-free as possible. This is not a necessary procedure for a reproduction, but I think every artist's original work is a potential heirloom, so I seal my wood frames.
A lesson I learned the hard way is to avoid compressing the framing materials together tightly and nailing the backing board down like a coffin lid. The pressure smashes the artwork on all sides, preventing natural expansion and contraction, which has the same effect as taping all the edges, and the mat and artwork may warp, ripple, and wrinkle. I've learned to ease up, imagining the artwork as alive, breathing and moving in its home inside the mat and mounting board.
Several options for glazing are available. I prefer using Tru-Vu's Museum Glass to frame my pastels because it reduces glare, eliminates 99% of the UV light damage to artwork, and has amazing clarity. Unfortunately, the cost of Museum Glass is amazing, too. You can buy a less expensive glass that reduces UV damage, but it either reflects, or has poor clarity. To protect your photographs and reproductions from UV damage, a good choice might be Tru-Vu's Conservation Glass. It not only blocks UV, but also it takes fewer bills from your wallet. Tru-Vu's website provides more information about glass and about distributors for its products. The lesser of glazing options is using regular single-strength glass. It is reflective, doesn't protect the art from light, and it has a green tint to it.

Museum Glass is nearly invisible and blocks 99% of UV; however, it's very expensive and requires extra care in handling and cleaning.
Personally, I think regular glass is still okay for a reproduction if protected from UV damage by varnishing it with a product formulated to inhibit UV light. I avoid sprays because of the toxicity. Using a flat brush, I coat the surface with a matte UV resistant varnish. The product I use is Golden's Polymer Matte Varnish with UVLS. It's available from Dakota Art Store at http://www.dakotaartstores.com/mtvernon.html As quickly as possible after coating the surface with the varnish; I roll a brayer directly over the varnish on the reproduction to get a smooth, even surface. The use of a brayer is crucial. Then I let the paper dry. The paper will bend because of the difference in surface tension between the front and reverse side of the paper, but the weight of several books, after it is dry, will flatten it. If not flat, coating the back side of the reproduction will equalize the tension. Be sure to wash the brush and brayer immediately after using them.
When I frame pastels, I make a special hidden quarter-inch thick mat that extends the space between the glass and the art work. If pastel dust is dislodged, the dust particles drop unseen. Sometimes the bits of dust are visible on the edge of the mat. A little pastel dust is like crazing on an oil painting - part of the poetry of the medium.
Finally, a frame should always be sealed on the back with a dust cover. After a few years, it's surprising how much household dust and how many tiny insects can get into the framing materials. When practical, I choose an acid-free dust cover, such as those offered by Lineco.
If you're really serious about learning to frame your artwork, the next step might be reading a book on matting, mounting, and framing art. David Logan's book, Mat, Mount, and Frame It Yourself probably has all the information you need, including how to read a ruler to 1/16. For best framing practices, I recommend the book Conservation Framing by Vivian C. Kistler.
2018 Copyright by Np
0 Likes